A School Buyer’s Checklist for Ordering Crayola Products (Teacher Discounts, Air-Dry Clay, and Cost-Saving Tools)
-
Who This Checklist Is For (and What It Solves)
-
Step 1: Assess What Your Teachers Really Need
-
Step 2: Choose the Right Products (and Know Their Limits)
-
Step 3: Actually Use the Crayola Experience Teacher Discount
-
Step 4: Calculate the Total Cost (Including Hidden Fees)
-
Step 5: Place the Order and Manage the Logistics
-
Common Mistakes to Avoid
Who This Checklist Is For (and What It Solves)
If you’re the person responsible for ordering art supplies for a school district, a private school, or even a large daycare chain, you know the drill: teachers send you requests, you try to balance quality with budget, and somewhere along the line, something gets messed up—wrong products, missed discounts, or invoices that don’t match what you ordered.
I’ve been in that seat since 2020. I manage art supply procurement for a 2,500-student district across 5 elementary schools. My annual budget is about $85,000 across 8 vendors. And after a few costly mistakes early on, I built a checklist that keeps things straight. This is that checklist.
I’ll walk you through 5 steps: from assessing what your teachers actually need, to picking the right products, to using the Crayola Experience teacher discount (yes, it’s legit), to calculating total costs with simple tools, and finally, managing the order process. Plus, I’ll share a few things I’ve learned the hard way.
Step 1: Assess What Your Teachers Really Need
Don’t assume you know. I made that mistake my first year. I ordered what we “always ordered”—boxes of broad-line markers, standard colored pencils, and a few tubs of clay. But in November, three teachers complained they didn’t have enough fine-tip markers for writing projects, and the art teacher said the clay was too crumbly for her lesson plan.
Here’s what works: Send a short survey (3-4 questions) in May for the next school year. Ask:
- What specific Crayola products do you use most? (list common ones: markers, colored pencils, air-dry clay, etc.)
- How many students per class? (to estimate quantities)
- Any special projects coming up? (e.g., mural projects needing multicutural markers)
- Preferred format (bulk packs vs. individual sets)
One thing most people skip: Ask about past issues. If a teacher says “the last batch of washable markers stained the desks,” that’s a red flag you can avoid. In my case, a third-grade teacher told me the Crayola air-dry clay she ordered from another vendor cracked too fast. Turns out, the product wasn’t the problem—the box had been stored in a damp storage room. But knowing that upfront saved me from blaming the wrong supplier.
Step 2: Choose the Right Products (and Know Their Limits)
This is where the “honest limitation” rule kicks in. I recommend Crayola for 90% of K-5 classroom needs—their washability is top-notch, colors are vibrant, and the non-toxic guarantee gives parents peace of mind. But I’m careful not to oversell it.
For markers: Crayola Ultra Clean is the best all-around choice for washability. But if you’re buying for high school art classes, consider professional-grade options (like Prismacolor) too. The washable formula is great for kids, but serious art students often want pigment permanence.
For air-dry clay: Crayola’s air-dry clay works well for simple projects—pots, ornaments, small sculptures. It dries smooth and accepts paint nicely. But don’t use it for large structural pieces (like a freestanding figure over 12 inches). It’s not durable enough. I learned this when a fifth-grade class built a giant diorama and it cracked in a week. I switched to Stoneware modeling clay for those big projects.
For colored pencils: Crayola colored pencils are fine for basic coloring and drafting. But if you need rich blending or heavy pigment, go for Crayola’s Signature line or an artist-grade brand. The standard ones are “good enough” for most classrooms, but not for serious illustration.
Step 3: Actually Use the Crayola Experience Teacher Discount
This is the part where I confess: I ignored the teacher discount for two years. I assumed it was a tiny savings like 5% that wasn’t worth the hassle. That was wrong.
In 2022, I finally signed up for the Crayola Experience teacher discount program (it’s free, just verify your educator status). The savings are around 30% on select products, and it’s stackable with bulk discounts. For my first order using the discount, I saved $1,200 on a $4,000 order of markers and colored pencils. That’s enough to buy an extra 20 sets of air-dry clay.
But here’s the catch: The discount applies to products listed on the Crayola Experience site, not all items. And it’s not available on every order channel—you have to order directly through the Crayola Education portal or a partner like School Specialty. I almost missed this because I always went through a general distributor. Now I check the portal first for the discount items, then buy the rest elsewhere if needed.
Tools I use to compare: When I have two price options—say $3.50 per pack with a 30% discount vs. $2.80 per pack without a discount at another vendor—I pull up a percentage decrease calculator online. It’s a quick way to see final price per unit. I also use a macro calculator to compare total cost for the year across multiple product categories. It’s not fancy, but it saves me from spreadsheet errors.
Step 4: Calculate the Total Cost (Including Hidden Fees)
This step sounds obvious, but I’ve messed it up three times. The “price per item” on the catalog is not the final number.
What to include:
- Base price per unit
- Discounts (teacher discount, bulk discount, early-payment discount)
- Shipping fees (often $15-$50 for large orders over $100)
- Tax (if your district is exempt, you need to provide exemption certificates)
- Restocking fees (if you return unsold product)
- Any “minimum order” surcharges (some vendors charge a flat $10 if you order under $250)
Real example: In my 2024 order, I saw Crayola air-dry clay listed at $4.50 per pack for a 2-pack. The teacher discount brought it to $3.15 per pack—great. But I didn’t realize shipping was $22 for the 100 packs I ordered ($450 base cost). That added about 5% to the total. Still worth it, but I wish I’d known upfront.
I use a simple spreadsheet with a macro calculator (just an automated formula) to sum everything up. Also, when I want to see the real savings from a discount, I use a percentage decrease calculator to compare old vs. new prices. Last week, I ran the numbers for the teacher discount on markers: 30% off $2.80 = $1.96 per pack. That’s a 30% decrease, but when I included shipping, the net saving was about 22%. Still good, but I like knowing the exact number.
Step 5: Place the Order and Manage the Logistics
Once you’ve chosen products, applied discounts, and calculated costs, it’s time to submit the order. Sounds simple, but here are the pain points I’ve encountered:
- Invoice errors: In 2023, a vendor sent me an invoice that didn’t reflect the teacher discount. I had to send a screenshot of the portal price and follow up 3 times. Now I always request a draft invoice before payment.
- Delivery timing: School deliveries often arrive at the end of August or early September, right when teachers are preparing classrooms. I’ve learned to order by the first week of August for a September delivery. Last year, I ordered in mid-September, and the clay arrived after the project started. That pushed the lesson plan back a week.
- How to add a printer for labels: This is a small but annoying logistical issue. If you’re like me, you need to print labels for each classroom’s supply boxes. I was always fumbling with the network printer until I learned the simple steps: go to Settings > Bluetooth & devices > Printers & scanners, then click “Add device.” It took me 2 minutes. Now I save that instruction sheet for new staff.
Checklist before clicking “submit”:
- Does the order include the teacher discount code or portal link?
- Is the delivery address correct (not the previous year’s)?
- Do you have the tax exemption document ready (if applicable)?
- Can your printer handle the label size? (I use Avery 5160, and I had to Google “how to add a printer” when it stopped connecting last year.)
Common Mistakes to Avoid
I compiled this list from my own mistakes and from what other district buyers have told me:
- Assuming all “washable” products are the same: Crayola’s washable formula is industry-leading, but it’s not stain-proof on all surfaces. If you have older desks with rough wood, test a marker first. I learned this when a teacher’s marker marks wouldn’t come off a 10-year-old laminate surface.
- Not checking expiration on teacher discount codes: The discount portal updates its product list. In 2023, I assumed the air-dry clay was still eligible, but it had been removed. I didn’t catch it until after I’d placed the order. Now I check the portal list every time before ordering.
- Forgetting to order extras for testers: Every year, a few teachers want to try a product before making a class-size order. I set aside $200 for sample packs. It’s saved me from ordering 500 packs of something teachers don’t like.
- Ignoring the math: I’m not a numbers person, but a simple percentage decrease calculator has saved me from overpaying on bulk orders. For example, if a 12-pack costs $5.00 and a 24-pack costs $9.00, the price per unit is $0.42 vs. $0.38—a 9.5% decrease. That’s worth doing the math for high-volume items like pencils.
One final thought: No checklist is perfect for every situation. If you’re running a very small school (under 200 students) with a tiny budget, you might find that buying in bulk from a general office supplier is cheaper than going through the Crayola portal because of shipping minimums. My advice: use the checklist as a starting point, but always cross-check with a local vendor if possible. I’ve learned that the “best” way depends on your district’s location, teacher preferences, and budget cycles. And that’s okay—it’s better to be honest about what works for you than to follow a one-size-fits-all plan.
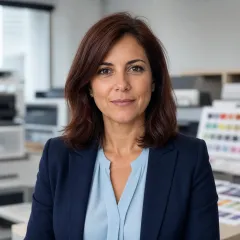
Elena Baptista
Elena Baptista is an office printing and imaging analyst covering laser and inkjet printers, multifunction devices, copiers, label and receipt printers, ink cartridges, toner cartridges, and drum units. She applies ISO/IEC 24734, ISO/IEC 24711, and ISO/IEC 19798 methods while comparing print speed, first-page time, duplex throughput, duty cycle, page yield, coverage assumptions, resolution, color consistency, energy use, and maintenance intervals. Her guides help offices, schools, dealers, and procurement teams match output volume, media handling, connectivity, consumable economics, service access, and fleet-management requirements.